Chicken Stock

I had a luxuriously large kitchen in Brooklyn with a full-sized fridge and freezer that I took for granted. I'd regularly make large batches of chicken stock and freeze the golden liquid in quart-sized containers to use whenever I needed, never worrying about space. Now that our Parisian freezer is disrespectfully small—the size of two and a half pizza boxes stacked on top of each other—I've had to rethink my chicken stock strategy. I no longer have space to save and freeze leftover chicken bones from roasted chickens (here’s my recipe), nor do I have room to make and freeze large quantities of stock—le sigh. 

Fortunately, I've figured out a way to keep four quarts of stock handy in my tiny freezer by applying a technique that I picked up in my French culinary school training—reduction. Reducing is quite simple; it just takes time. The technique is simply driving excess water out via boiling. By driving out the water, you concentrate the stock's flavor while drastically reducing its volume. You can also use this technique to make jus or glace/demi-glace for opulent French sauces. I concentrate my stock into a quarter of its original volume and store it in two pint-sized jars that fit neatly into the freezer. When I need her to join the party, I thaw her in the fridge overnight and reconstitute with water. 

A large batch of chicken stock made in my BK kitchen—le (wistful) sigh

Recipe Type: Easy Project

Time: 4 hours

Servings: 4 Quarts or Liters (2 pints when reduced)

Ingredients

1 medium onion 

3 cloves of garlic

1 carrot

1 stalk of celery

1 cup of chopped leek

1 handful of parsley stems

2 raw chicken carcasses 

4 raw whole chicken wings (drumstick and flap)

Leftover chicken bones from roasted chickens (optional)

1 bay leaf

A couple of sprigs of dried or fresh thyme

5 peppercorns 

1 teaspoon vinegar (apple cider or white)

Equipment

Stockpot

Various mixing bowls

Large Fine Mesh Sieve

Ladle

Skimmer (optional but highly recommended)

Four quart containers or two pint containers or four cup-sized containers or jars (if concentrating)

Instructions

  • Peel the onion and garlic. Wash the carrot, celery, leek, and parsley stems. Leave the garlic skin on and place it into the stockpot. Chop the onion, carrot, celery, leek, and parsley stems into rough one to two-inch pieces (this is a mirepoix cut). 

  • Cut up the chicken carcasses and wings into smaller 4-5 inch pieces to save space in the pot with sharp kitchen shears or cleaver, and place the chicken carcasses, wings, and various other chicken parts into the stockpot. If you have a large stockpot, you can omit this step and toss the chicken parts in whole (I do not have a large stockpot because everything in Europe is tiny).

  • Cover the pot with water, add around five quarts/liters, place on the stove, and bring to boil over high heat. 

  • Once the pot has come to a boil, reduce the heat so that the liquid simmers gently but regularly. Add the bay leaf, thyme, peppercorns, and one teaspoon of vinegar to the pot. Cook for two and a half hours, checking on the stock periodically, skimming any grey/brown gunk off of the stock while leaving the fat. Fat equals flavor.

  • When the chicken is falling apart, and you can see that the meat and bones have given all that it can flavorwise to the stock (the meat will be dry and crumbly and the bones will be soft and super fragile), strain the stock and place into quart containers. Let the stock cool uncovered on the counter for an hour. Then, cover the containers and freeze stock immediately (to avoid the spread of bacteria).

  • If you want to concentrate the stock further, wash the stockpot out, then boil the stock in the cleaned stockpot on medium-high for another hour, or until the mixture has reduced to a quarter of its original volume. Each cup of stock is equivalent to one quart/liter. You can add water to reconstitute the concentrated stock when ready to use.

  • To use the stock, thaw in the fridge overnight, or place the jar in lukewarm water for an hour or two until it comes out of the jar and reheat semi-frozen stock in a pot.

Bonus Dog Treats

IMG_6753.JPG

If you have a dog, you can make treats for your pup with the leftover chicken meat from the stock. Carefully remove the cooled chicken meat and skin from the bones and shred the meat into bite-sized pieces for your doggo. Dehydrate the chicken on a baking sheet in the oven at around 250 degrees for 45 minutes to an hour until they're completely dry. Store the treats in a jar and use them within a couple of weeks.

My poultry loving pup, Gaston, eyeing the Thanksgiving turkey.

My poultry loving pup, Gaston, eyeing the Thanksgiving turkey.

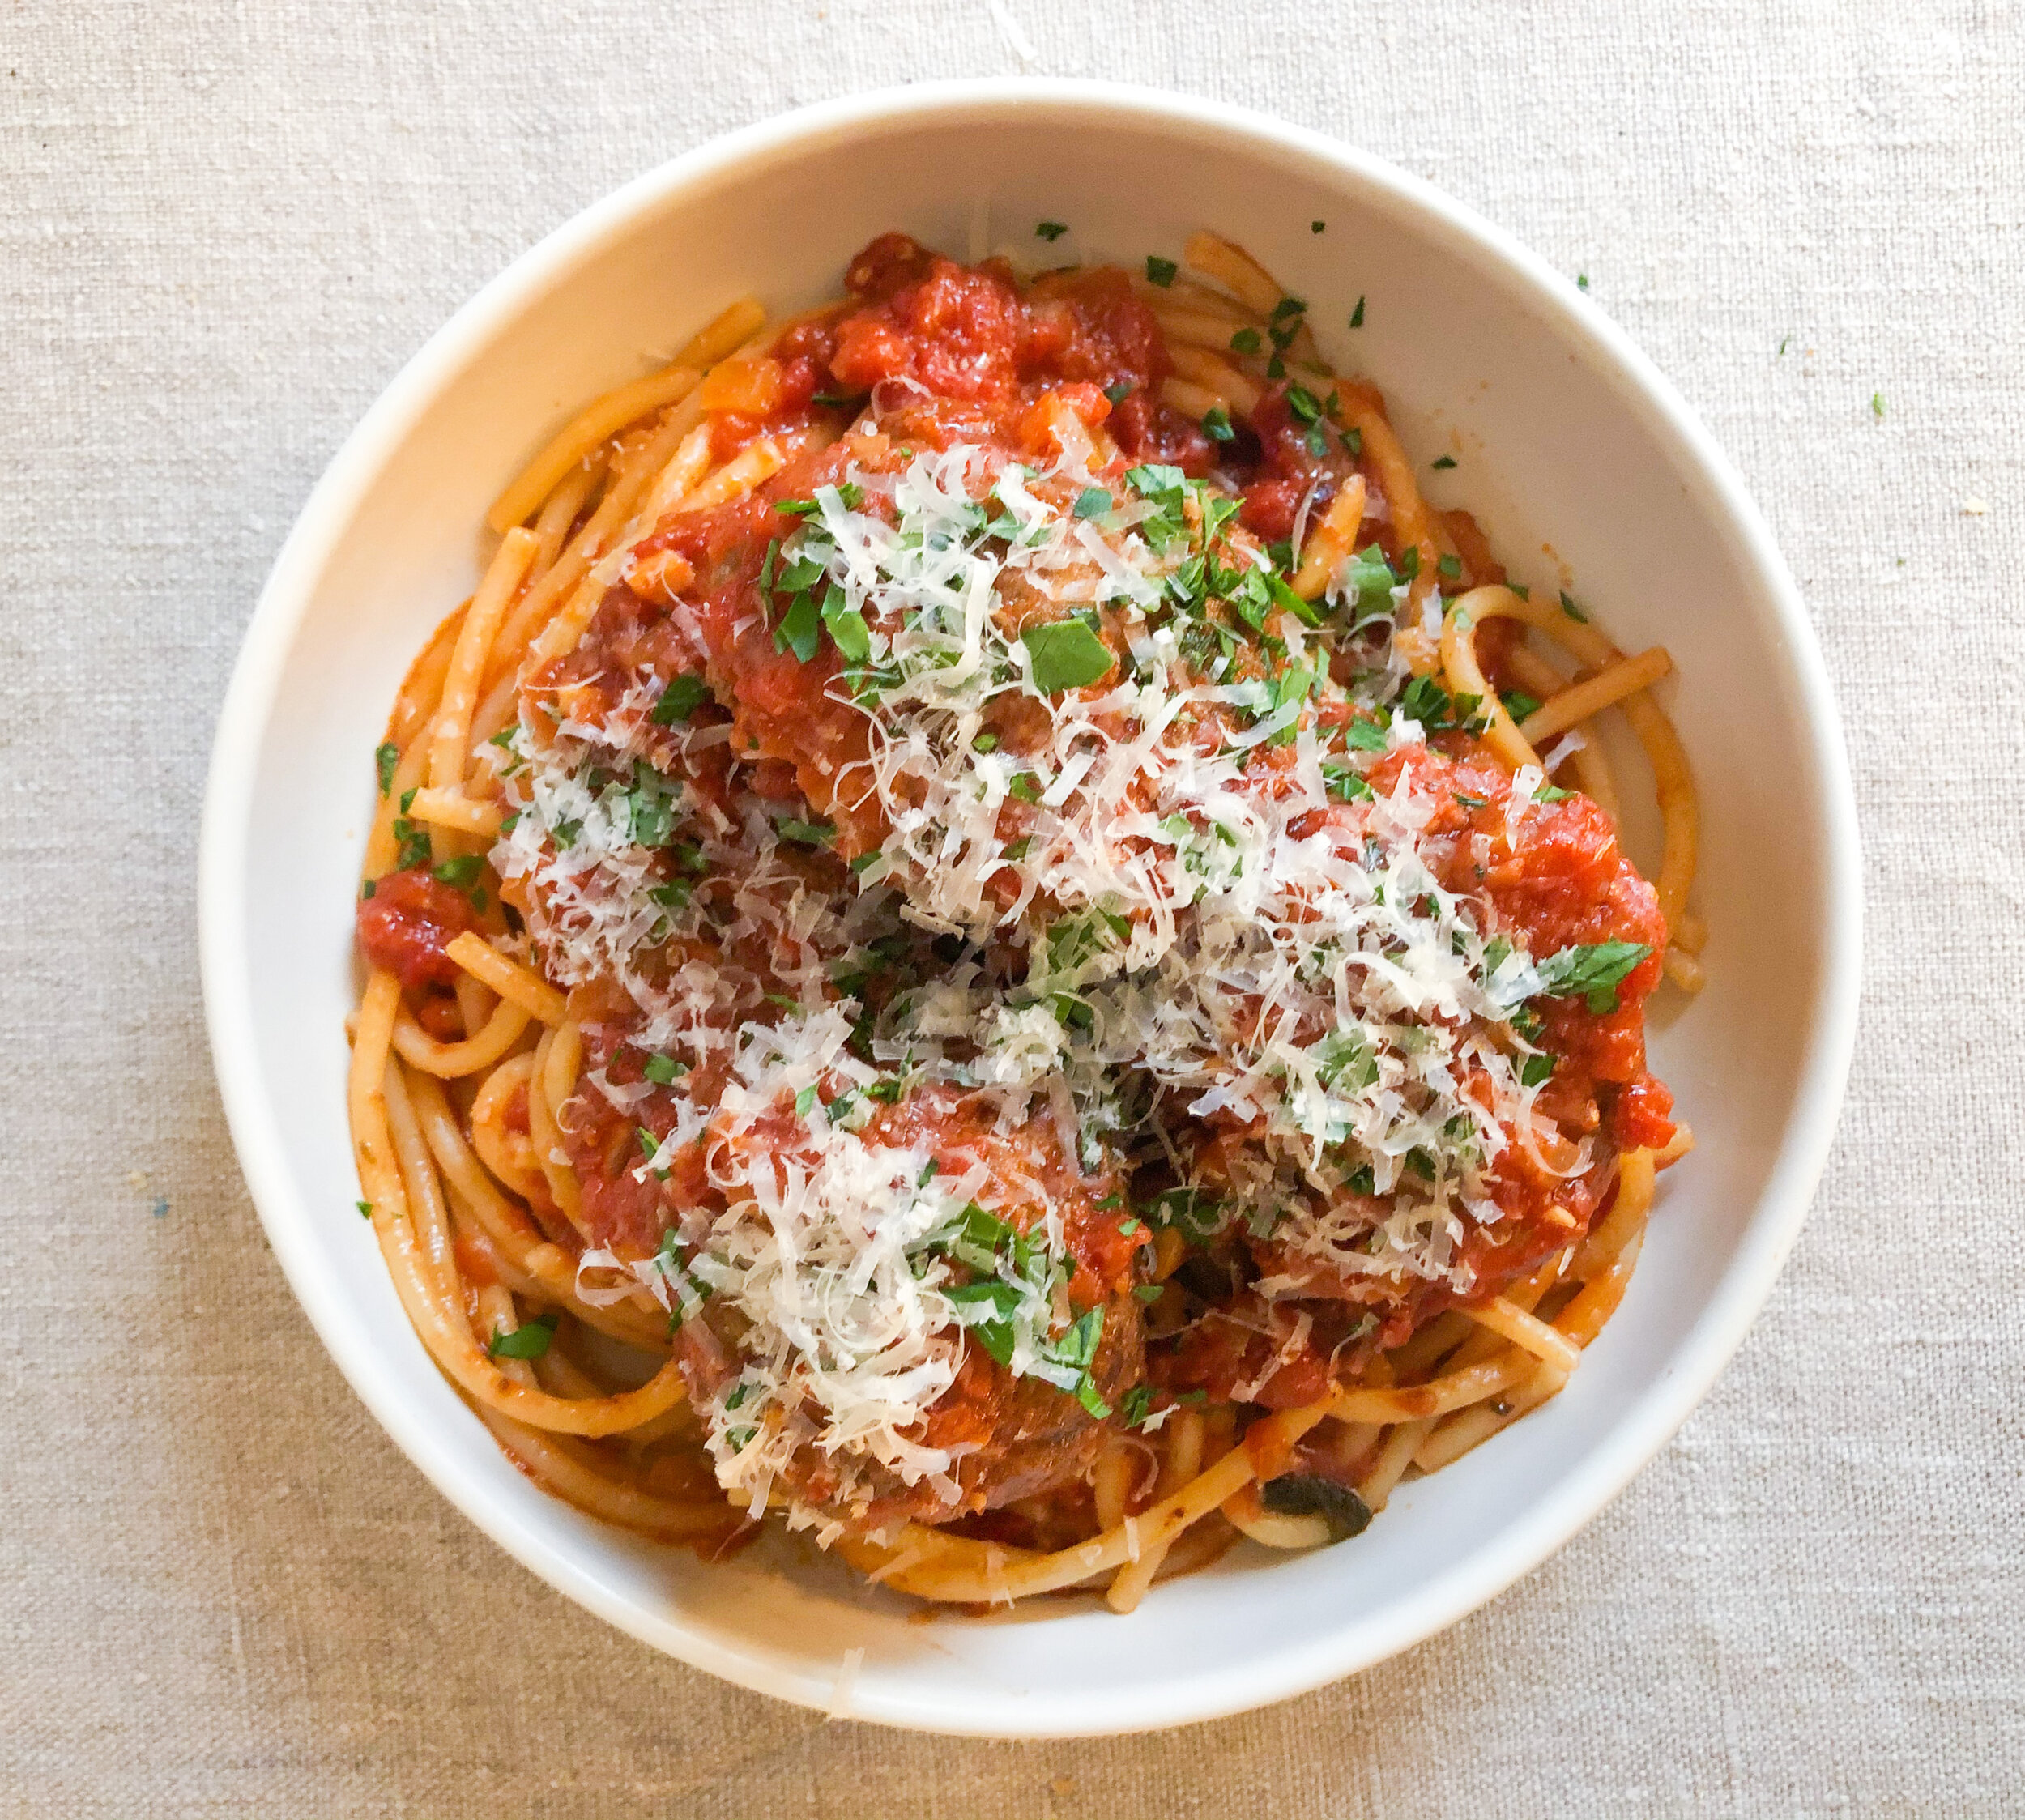
Spaghetti and Meatballs

I rarely needed to make meatballs and red sauce in NYC, but it was always a special occasion food and a weekend project to look forward to when I did. I would go to Paisano's or Fleisher's butchers to get some high-quality beef, pick up some crusty bread, and cook while listening to a podcast or NPR. I'd make the meatballs, sear them up, and finish them in a simple red sauce. Then, we'd have friends come over to tuck into the pasta.  

I was hesitant to write a recipe because I'm not Italian, and I don't want to be appropriative. But, folks reach out to request the recipe when I shared stories of it on IG. I want to be clear that this is my interpretation and instructions of a classically Italian-American dish that draws from many wonderful Italian cookbooks, chefs, restaurants, and friends. I hope to share what I've learned from these wonderful traditions and voices in a respectful and not appropriative way. The most impactful inspiration to my current version of meatballs comes from the meatballs served at Frankies 457 in Brooklyn; they're huge, juicy, and come three to a small plate piled with red sauce filled with pine nuts and raisins. I'll always remember how succulent and juicy the meatball was, how the raisins had plumped in the juices to add a touch of sweetness to each bite, and how the pine nuts added savory morsels of opulence. The version of meatballs and red sauce that I make today, in 2020, has evolved over a couple of decades of making this dish. It might be one of the foods that I first learned how to cook, a food that I have a history with, and is incredibly comforting and reminds me of friends and family. You can read part two about Spaghetti and Meatballs in the November newsletter coming out tomorrow. If you haven't already, subscribe!

This recipe makes 18 meatballs, which can serve up to six people. You can split the recipe in half. Or, cook the full recipe and freeze a portion of it for up to two-months. Thaw the sauce in your fridge overnight and reheat over medium-low heat for 20-30 minutes. I like to make the whole batch at once and eat the meatballs throughout the week in various iterations: on a sandwich with melted cheese, alongside vegetables, or with pasta.

IMG_5823.JPG

Recipe Type: Dinner/project 

Time: 2.5-3 hours

Servings: 6 servings

Ingredients

Meatballs

¼ cup pine nuts

½ cup of bread crumbs or 1½ cup of day-old bread (any kind) with crusts removed torn or cubed into 1-inch pieces

½ cup of milk

2 lbs or 900 grams of ground beef with about 10% fat 

One medium onion diced into ¼ inch pieces 

4-5 cloves of garlic finely chopped

¼ cup of chopped parsley

½ cup of golden raisins

One tablespoon zest from an orange or a lemon

Three eggs

½ cup of grated Parmesan or Pecorino cheese

One teaspoon freshly grated nutmeg

Salt and pepper 

1 cup of neutral oil for frying 

Red Sauce

One medium onion diced into ½ inch pieces

4-5 garlic cloves minced

Two 28-oz cans of whole peeled plum tomatoes

One teaspoon oregano

One teaspoon crushed red pepper

Olive oil

1-2 teaspoons granulated white sugar

Two one-pound packs of spaghetti

For serving

Finely chopped parsley

Parmesan for grating on top of the pasta

A big green salad

Equipment

Mixing bowls

Measuring cups

Chopping board/knife

Frying pan or skillet

Large pot for boiling pasta

Large heavy-bottomed pot for red sauce

Tongs

Small sheet tray

Instructions

Preparing meatballs is one of those meditative tasks that takes a little bit of practice to master. Take it easy and be kind to yourself if this is your first time making them. They're kind of like learning how to fold dumplings. The more you do it, the better and faster you'll get at making them. Think of this as an opportunity to listen to your favorite podcast or an audiobook while you're cooking. For an enjoyable time in the kitchen, set yourself up for success by reading through the instructions before cooking, preparing your mise en place, and cleaning as you go!

Toast Pine Nuts and Soak Bread Crumbs

  • Place the pine nuts on a small sheet tray and toast in a preheated 350℉ 175℃ oven and set a timer for 4 minutes at first and keep adding a minute to the time until they're lightly golden and fragrant. Keep your eye on the oven because the nuts will go from toasted to burned in seconds. Pull from the oven and let cool on a wire rack.

  • Soak bread crumbs or the cubed or torn bread into the milk in a bowl for around 5-10 minutes.

Meatballs 

IMG_5771.JPG
  • Add the ground beef to a large mixing bowl.

  • Peel two onions and toss the skins. Chop the first onion into a ¼ inch dice for the meatballs into the mixing bowl with the meat. Chop the second onion (for the gravy/sauce) into a ½ inch dice and set aside in a small bowl.

  • Mince 8-10 cloves of garlic. Add half of the garlic to the mixing bowl with the meat, and set aside the other half in a small prep bowl.

  • Mince ½ cup of parsley, add half into the mixing bowl with the meat, and reserve half in a small prep bowl for garnishing later.

  • Chop half of the raisins into smaller pieces and leave the rest whole. Add all of the raisins to the mixing bowl with the meat mixture along with one teaspoon of grated nutmeg, one teaspoon orange zest, the toasted pine nuts, two eggs, ½ cup of grated parmesan, one teaspoon of grated nutmeg, and soaked bread or bread crumbs. If you've soaked the cubed bread, crumble the bread into small pieces (the size of peppercorns) and add to the meat mixture along with the residual milk.

  • Season with one tablespoon of kosher salt (adjust to half a tablespoon if you're using table salt) and 8-10 grinds of fresh pepper (or around one teaspoon of pepper).

  • Mix the meat mixture by hand for 2-3 minutes until thoroughly combined.

  • Heat the skillet and add a ½ inch layer of oil to the bottom of the pan. Take one teaspoon of meat and form it into a little hamburger patty. When the oil heats up, fry it until cooked, and taste it for seasoning. You'll most likely need to add more salt. Make another patty and fry it to taste the seasoning, and continue doing that until seasoned to your liking. Turn off the skillet while you form the meatballs.

  • Using a ⅓ cup measuring cup, scoop ⅓ cup meat portions into your hand and tightly form into round balls. Place on a baking sheet.

  • Heat the skillet, and when the oil is hot (when you place a meatball in the oil, it should have a nice sizzle), fry the meatballs in a pan, taking care not to overcrowd the pan. Leave 2-3 inches around each meatball. Let each face of the meatball sear and get a deep brown crust. Once one part of the meat gets a crust, I like to use two spoons to gently roll the meatball onto another face of the ball to sear that side and do that until all the meatball sides are seared.

  • Getting a good sear on the meatball is crucial to adding flavor and preventing it from falling apart in the sauce. You don't need to worry about cooking the meatball all the way through because it will finish cooking in the sauce.

Sauce

  • In a large heavy-bottomed pot (I use a 7-quart Dutch oven to prevent the sauce from burning), add 3-4 tablespoons of olive oil and heat the pan. Once the oil is hot, add the reserved ½" diced onion for the sauce and cook for two minutes or until they become translucent. Then, add reserved minced garlic and cook until the garlic is fragrant and translucent (a minute or two). Take care not to brown the onion or garlic.

  • Add one teaspoon of crushed red peppers and toast for 30 seconds or so.

  • Add one teaspoon of oregano to your palm and rub your hands together over the pot to release the oils. Add the oregano to the pot.

  • Add the canned tomatoes by taking the tomatoes two at a time and crushing them and breaking them into tiny pieces with your hands over the pot. Then add the liquid from the cans and rinse out the cans with some water and add that rinsed tomato water to the pan. Add one teaspoon of sugar and a generous pinch of salt, and 3-5 grinds of pepper. Bring the sauce to a boil, then lower to a gentle simmer.

  • Simmer for 30 minutes over medium-low heat. You want the sauce to have a gentle and consistent boil. Stir it every 5 minutes or so to make sure it's not scorching or sticking to the bottom of the pan.

  • After the sauce has cooked for 30 minutes, lower the heat slightly, gently add the meatballs into the sauce and cook for 30 more minutes. Stir occasionally to make sure the sauce isn't sticking to the bottom of the pan.

  • Bring a pot of water to boil, and keep it hot on the stove over low heat. During the last 10 minutes of meatball cooking, cook the spaghetti for two minutes less than the suggested time. Before draining the pasta, save one cup of pasta boiling liquid (I use a measuring cup and scoop from the pot), then drain the spaghetti in a colander in the sink.

  • Immediately add the pasta back to the same pot plus half a cup of pasta water. Spoon in a cup or two of sauce (no meatballs) and cook the pasta, sauce, and pasta water, stirring gently together until cooked al dente. The pasta will continue cooking and absorbing the liquid.

  • Add more sauce and pasta water as you need to have a nice glossy sauce. Remove from heat, add to a large pasta bowl or individual bowls. Ladle more sauce on the pasta and place the meatballs on top. Garnish with chopped parsley.

How to Serve

  • Serve family-style or in individual bowls. I like to serve three meatballs per person.

  • Serve with crusty bread and a big green salad.

IMG_5784.JPG

100 Day Lacto-Fermented Plum Syrup (Cheongs)

Around July, little sugar plums would emerge at the Brooklyn Prospect Park farmer’s market plump and resplendent in their gold, ruby, and violet skins. Charmed by these gentle nuggets, I began preserving them with a Korean lacto-fermentation method used to make maesil-chung. Maesil-cheong is an extract or syrup made from green unripened apricots that are packed in sugar and left to ferment for 100 days. During this time, the sandy sugar turns into a clear then richly hued liquid. After 100 days, the syrup is ready to strain. The remaining fruit can be used one more time to make a plum flavored liquor.

This is a fabulous low-drama long term fermentation project. During this summer, I’ve made three types of syrup with cherries, green Reine Claude plums, and purple Quetsch plums. And, I’ll most likely make another jar of Quetsch syrup and one with small yellow Mirabel plums before the season ends. I love to burp the jars every few days and taste how the flavors of the syrups changes over time. Although I’m sad to see summer go, I’m excited for the syrups to become ready to brighten up my cooking during the dark and cold winter months.

I’ll share recipes of how to use this beauty syrup in the coming months. I hope you’ll make some syrup with me. Stay in the loop by subscribing to my monthly newsletter!

Recipe Type: Low-drama project

Time: 100 days, plus some light maintenance.

Servings: around ¾ a liter of syrup

Ingredients

~400 grams of firm summer plums (cherries or currants work well too)

~400 grams of white sugar

Optional

1 bottle of vodka or 4 bottles of soju

Equipment

1 sterilized glass 1 liter jar or 1.5 liter glass jar

Scale

Masking tape and permanent marker

Instructions

The ratio of fruit to sugar is 1:1. You can use as much or as little fruit as you want. I’ve written this recipe to fit into a one liter jar. You can scale it up or down as you wish. 

Preservation

Wash, sterilize, and dry a 1 liter glass jar (you can sterilize with boiling water or run the jar through a dishwasher). Then, wash and drain the fruit. Weigh the fruit and add the exact same amount of sugar to another bowl—if you have 453 grams of fruit, you’ll need 453 grams of sugar. Set aside a half cup of sugar to top the fruit later. 

Fill the sterilized jar by layering the fruit and sugar taking care to pack the jar tightly while not damaging the fruit. Add the reserved ½ cup of sugar to the top of the jar at the end so that the fruit is fully submerged in the sugar. If the jar is too full, don’t worry, keep the sugar in a separate jar or bag. Add it to the mixture in a couple of weeks after the sugar has liquefied. 

Set the jar on top of a plate or small baking sheet in a cool part of your kitchen. Label the jar with the date started and the type of fruit you use. Your 100 day wait begins.

Fermentation and Observation

Over the next few weeks the sugar will begin to liquefy. If you have reserved sugar, add it back to the jar when there is room in the jar. Once 80% or so of the mixture is liquid, gently stir the mixture with a long sterilized spoon once a week or so to encourage the sugar at the bottom to liquefy. I like to submerge the fruit on top into the syrup while I’m stirring to prevent the tops of the fruit from getting moldy. You can also use fermentation weights to submerge the fruit under the liquid. I’m too lazy to do that, so I just stir the fruit occasionally. Take care to keep the fruit intact when you stir, and don’t add anything foreign to the mixture. 

Carefully monitor the extract, small bubbles should emerge from the fruit as the sugar liquefies. The bubbles indicate that lacto-fermentation is happening. If there aren’t any bubbles after 4-6 weeks, chances are something went wrong. Toss this batch., it’s not worth the risk of consuming something contaminated. Burp the jar every couple of days depending on how active the mixture is so that pressure doesn’t build up in the jar. This is very important to release the carbon dioxide coming from the syrup so that the jar doesn’t explode. If you’re going to be away for a week, burp the jar, then, stick it in the fridge to slow down fermentation. 

Sample the syrup occasionally with a sterilized spoon (only if there are bubbles coming from the fruit), and notice how the syrup evolves over time. 

Notice the small white bubbles that indicate fermentation is occurring. These were very bubbly and active because they were kept out in warm summer weather.

Notice the small white bubbles that indicate fermentation is occurring. These were very bubbly and active because they were kept out in warm summer weather.

The Final Beauty-Syrup

After 100 days, the syrup will be ready to strain into a clean and sterilized glass jar or bottle. Used in teas, cocktails, mocktails, marinades, and however else you want. 

Optional Step: Make Plum Infused Liquor

You can leave the remaining fruit in the jar and add a bottle of vodka or four bottles of soju. Wait a month or so for the plums to infuse the alcohol. Strain and add to cocktails!

Lacto-Fermented Hot Sauce

Late summer/early fall is when peppers are in peak season in New York City, and they are magnificent. Floral, spicy, & fragrant, these beauty queen peppers can transform into a flavorful and complex hot sauce with some salt water and time. This hot-sauce is preserved through lacto-fermentation (just like kimchi). The Lactobacillus bacteria converts the sugars found in the peppers into lactic acid and creates an acidic environment that preserves the peppers. Fermentation takes anywhere from 1-2 weeks depending on how hot your kitchen gets, and this recipe can easily be scaled up or down as needed. 

LactoFermented HS.JPG

Recipe Type: Easy project

Time: 30 minute hands on time and 1- 2 weeks of fermentation

Servings:

Ingredients

  • 1/4 tsp coriander seeds

  • 2 garlic cloves 

  • 1/4 teaspoon peppercorns in the color of your choice

  • Fresh chilis in any variety

  • Optional additional produce like tomatoes or tomatillos

  • Optional 1/4 onion  

  • Salt

Equipment

  • Glass jar or fermentation crock large enough to hold your produce

  • Optional - fermentation weights

  • Mixing bowls

  • Colander

  • Scale (optional)

  • Food safe disposable gloves

  • Blender

  • Containers to store the hotsauce - sterilized

Fermented Peppers.JPG

Recipe updated August 24, 2023.

I’ve modified this to be more of a technique and guidance rather than a prescribed recipe. I want to encourage you to experiment and have fun with this hot sauce.

Originally, I made this hot sauce using exclusively chilis, but realized that I riff on this recipe when I make my hot sauce. I am lucky to have lived in places with an abundance of gorgeous produce and will add whatever is looking delicious and is in peak season. Right now, I have an abudance of tomatillo, tomatoes, and other local peppers that our farmers have been producing. The key to proper fermentation is using brine that’s at least 5% salt (if you don’t want to measure a good rule of thumb is if it tastes as salty as seawater, you’ll have enough salt in the water). Happy fermenting, and let me know how it’s going (tag me on ig or send me an email)!

Instructions

  1. Prepare your produce. I suggest wearing disposable food-safe gloves while you prepare spicy chilis as a precaution. Cut peppers into 2 inch pieces and get rid of the stems (compost, please), if you want more heat, leave the seeds and gills inside the pepper, if you want less heat, remove. Cut additional produce into 2 inch chunks as well. Place all produce including onion and garlic into your fermentation jar.

  2. Prepare salt brine in a mixing bowl. Mix one quart of water with 5% of its weight in salt. You can use a scale and calculate the weight of the salt or use this pickling brine calculator. If you don’t have a scale, no problem, mix your salt into one quart of water gradually tasting the water as you go. It should taste salty like seawater (FYI -Lacto-fermentation needs only 2% salt to occur).

  3. Add the remaining spices into the crock: the coriander seeds, cardamom pods, garlic, and peppercorns. Pour the saltwater brine over the peppers and ensure the liquid covers the peppers. If you have fermentation weights, gently place them over the pepper to submerge them under the liquid.

  4. Set your fermentation jar/crock in a cool part of your kitchen and let it ferment for 1 - 2 weeks. Within the first two days, you should see tiny bubbles coming out of the peppers. This means your peppers are fermenting. If you don’t see bubbles coming out of the peppers within 5 days, I would advise you to toss the batch and start over. If your kitchen is warm, then let it ferment in the kitchen for 2 days, and then transfer to the fridge to continue fermenting for 2 weeks.

  5. Make sure to let gas out of your jar every few days so that pressure doesn’t build up in the jar.

  6. Once the produce has fermented, they’ll let off less gas and will have changed slightly in color and texture (they’ll become less vibrant). Strain the produce over a bowl. Carefully remove all of the cardamom pods and other spices that you don’t want to blend into the sauce and discard (okay to bend the cardamom and whole pepper).

  7. Place the produce into the blender and add 1/4 cup of the brine to the produce. Blend until smooth. Taste the sauce. Add more brine if you want the sauce to be more liquid, but note, you’ll add more salt into the hot sauce. I like to season my hot sauce just a touch saltier than I want the final product to be by adding a generous pinch of salt to the blended hot sauce. I do this because the sauce will continue to ferment and the salt with mellow over time.

  8. Store the hot sauce in the sterilized containers in the fridge. I store mine in mason jars. They’ll continue to ferment in the fridge and should be good for up to a year — if it makes it that long. 

How to Serve

Enjoy with Breakfast Nachos or on anything really. I love to give little bottles as gifts!